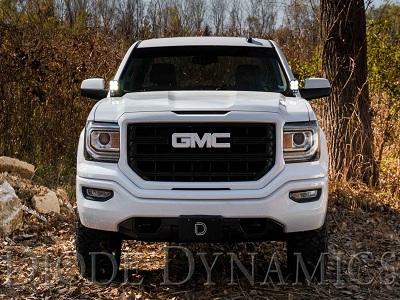
Not every vehicle has ditch lights, and it’s decidedly difficult to mount ditch lights to some others. Still, where they are used they provide a lot of utility in the form of visibility, typically at a 45° angle off to the sides of the road. For off-roaders, this is valuable for keeping an eye on wildlife and detecting environmental hazards that might reach into the road at night. Extra light output is always good in a scenario light this.
Also, as great as the quality of halogen lights can be, LED lights last longer, provide excellent color temperature and luminosity, and are less easily affected by adverse conditions than halogen lights. You just need to know where to find them and how to install them.
The Stage Series LED Ditch Light Pod Kit that you can find at Diode Dynamics can easily be mounted to a GMC Sierra 1500 without making any modifications to the vehicle. Best of all, the LED lights are a plug and play solution that will work with your current electrical architecture.
First you need to pick up a kit, which you can find via the link above on their website. Open the hood of your vehicle, and as a precaution, tape around the inside corners of the hood by the windshield to ensure that it maintains its alignment through the process and that nothing gets scratched.
Using a 13mm socket wrench, loosen (but do not remove) the bolts that secure the hood to the arm supporting it. Loosen them only enough so that the bracket can be worked between the hood and the hood hinge.
Slide the CAD-designed bracket that comes with the kit between the hood and the hood hinge arm, taking care to ensure that the washers align with the recesses on the bracket that are designed to accommodate them.
Before tightening the bolts again, make sure that the hinge has not displaced from the original tape marks. This will ensure proper alignment when the project is complete. Make adjustments at this point, if necessary.
Next, complete your wiring. This will not be covered by this article because the wiring can vary between vehicles. For more step by step information on wiring, contact Diode Dynamics at [email protected] or at 314-205-3033.
Once the wiring has been completed, you can install the SS3 LED Pod bracket on the Ditch Light Mount. To do so, set the universal bracket on the ditch light bracket platform, install the bolt, along with the washer, lock washer and nut. Thread them on and make them hand tight so you can make adjustments later if necessary.
Next, set the LED pod on top of the universal bracket and place the 5/32” bolt through the bracket and tube, secure it with the included nut. Tighten the bolts with a wrench but leave some play so you can make aiming adjustments.
Attach the connectors to the LED light pod and complete your aiming adjustments before tightening all of the bolts the remainder of the way. Finally, remove any tape markers you placed on the hood and repeat the steps already detailed in order to mount the light bracket kit and pod on the other side of the vehicle.
For more detailed information on how to conduct the wiring or for making other fine adjustments to the set up, contact Diode Dynamics at the addresses listed above. Alternatively, you can consult their YouTube channel which features many useful videos that offer similar instructions to those found in this article.
Their “How to Install Ditch Light Bracket Kit for 14-18 Chevy Silverado & GMC Sierra 1500” is particularly helpful on this topic. There are also a number of other useful videos on their channel that are helpful for learning how to mount brackets, LED light bars, fog lights and other auxiliary lights to your vehicle.
For more information about Automotive Led Lights and Led Light Bar Please visit : Diode Dynamics.


